Thursday, January 9, 2014

Chicken Run

Howdy all!

Our chickens are getting pretty big, and it is time to get them the heck out of the house, so we finished the chicken run! To start, we moved around the dirt near the chicken coop, to create a (roughly) flat area to set up the run:


We also wanted to give the chickens a nice base in which to play (and poop), so we took an old (and unsuccessful) compost heap, and moved it into the chicken run. The compost was mostly unbroken down leaves, hay, and grasses.

The run has a base of redwood beams. We were afraid of using the chemically treated, rot resistant wood given the proximity of the wood to the chickens. We want nice health eggs.

Here is a good photo showing the outline of the chicken run, in a nice little 'T'. The chickens need about 10 square feet per chicken, so this gives them enough room to run around.


After the base was done, we installed the vertical posts of 2x 4s, that will support the hardware cloth (do not use chicken wire! The holes are too big, and critters can still get their hands through the holes. We chose 1/4" hardware cloth, so nothing hopefully can get in.)

Here is Nicky relaxing:

After the vertical posts went up, we attached the horizontal ones that will hold the roof of wire up. We attached these to the chicken coop, which is a nice sturdy base.

After the wood was done, we put on a nice thick layer of paint to protect the wood:


Here is our door, which will be big enough to allow us to move compost in and out of the chicken run once our little egg makers start their magic.


A confused Ford investigates the chicken run.


Here I work to install the Hardware cloth (again don't use Chicken wire), which covers all the sides of the run to protect our chickens from possums, raccoons and alley cats.


Ford investigates the inside of the chicken coop.


The excess wire at the bottom of the run was folded 90 degrees, to prevent digging by creatures under the edges of the run. We will eventually cover these with concrete paver stones that will be heavy enough to prevent digging. As well, our dog Flint **loves** to stare at the chickens, eagerly licking his lips. The pavers will prevent him from digging into the coop as well.

Ford supervises our work from on top of the chicken coop:


Success! Our chicken wire can support the weight of a slightly overweight kitty cat : )


Still to do: Move the chickens out to the chicken coop.
                Finish the egg laying boxes
                Finish putting the pavers around the chicken run.
                Clean out my destroyed office!

Wednesday, January 1, 2014

Happy New Year Caterpillars

Howdy All,

Happy New Year! Nicky and I have been frantically working to finish up the chicken coop, so I can get the chickens out of my damn office! While we were working today, Nicky found four monarch butterfly caterpillars in one of our bushes, so we took a bunch of photos!


I also took some other photos as well, even though it is winter, we still have some pretty flowers!


Thursday, December 19, 2013

Chickens have arrived!

Howdy All,

We got our chickens finally! Here they are when they were small, and we first got them. We ordered them from Dare 2 Dream Farm, who (delivered!) us 6 chicks, a box, a water bottle, a food dispenser, food, and shavings for their bed. Unfortunately one was sick, and died a couple of days after we got them, but the company nicely replaced her for free!

We purchased:

2 Rhode island reds,
2 Easter Eggers,
2 Plymouth barred rocks


Here is a video we took of our chickens doing their thing: usually pooping, especially in their water bowl, which we have to clean out every 2 hours! (if you see nothing below, you can follow this link: Chicks!)


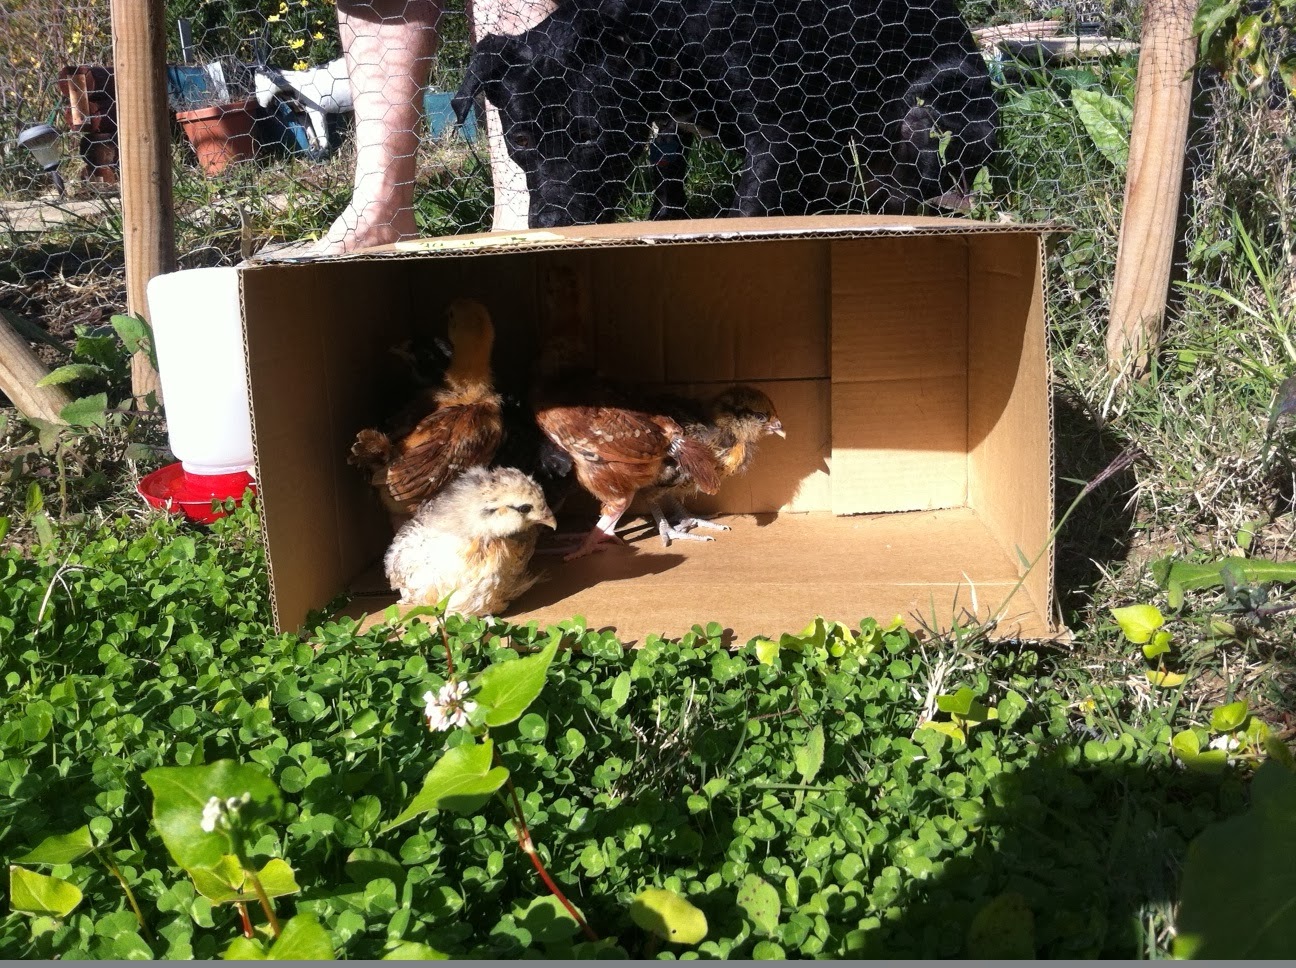
 Two weeks later, and our little chicks have gotten a lot bigger! We took them outside a couple of days ago, to let them see what the big wide world was like, but they didn't want to leave their box. We let them loose inside our enclosed veggie garden, thinking that they would be safe (which they weren't)!


Eventually we coaxed them out, and here they are, among the buckwheat and winter rye that we planted for the winter to revitalize the soil.


So cute! Poop my little darlings! Poop!


Flint is so curious about our little chicks, that he just loves to stare at them and lick his lips..... hmmmm. Eventually he snuck into the garden, and tried to either play (hopefully) or eat (unsuccessfully) the chickens! We caught him in time before he did any permanent damage to the chicks, other than psychological.


Hope you enjoy pictures of our chicks! We will update soon, as they get bigger!


 M & N


Saturday, December 7, 2013

Chicken Coop Construction Part 3


Howdy all!

Another (slightly late) update on our chicken coop! We mostly finished the inside of the coop, which is great since we got our chickens last week! We mostly buttoned up the coop so that little creatures can't get into the coop and raise havoc with our little darlings, who are still too young for the coop, and are comfortably napping under their heat lamp in my office : )

The chicken's opening into the yet unbuilt chicken run. Here you can see the track that will hold the sliding door, which we will close in the evenings to protect our little egg makers.

The sliding door in its track way. The green wire is what will open/ close the door.
The door way in it's track. The two pieces of wood are two halves of a 2 x 8 that I cut in half, left over from an old bunkbed I made.
The green wire runs through a pulley at the top of the coop and then runs through a hole in the side to allow easy opening/ closing.
The finished door! I tried to get the entire system in one photograph, but the coop is too small !
The end of the green wire, in the closed position. When we finish the run, this will be on the outside.
The green wire in the open position. It works like a charm! 
We also added the plexi glass to our custom chicken shaped window. The little circle you see in the middle isn't a hole, it is a reflection of the flash off the glass. We secured this with little penny nails, the same way you would with a picture frame.

We also placed screens over the vent holes for the coop. The mesh you see was left over from another project, and is a nice heavy weight, fine mesh.


The wire mesh installed inside the chicken coop. I secured it to the coop with nails on the bottom and sides, but did not use any nails into the roof, because I didn't want to puncture our nice little roof. I will (eventually) attach this to the roof with some high strength epoxy.


The chicken coop as it looks today! Still need to add the trim around the corners, which will cover the edges of the chicken wire we will be using for the chicken run. 


Wednesday, November 20, 2013

Chicken Coop Construction, part 2

Howdy All,

Here is part two of our multi part series on the construction of our chicken coop. We did alot of things this past week!


For starters, we put the permanent foundation blocks on. We did this to raise the wood up from the dirt, which would eventually start to rot the legs.


The new foundation raised the height of the nesting box, so we may need to raise up the dirt below it so Nicky can reach the eggs easily,


We also cut out some openings for our custom chicken shaped window. We are going to put a sheet of plexiglass behind it, once we finish painting.


We also finished the roof! This is a good thing since it is supposed to start raining soon. We put down a layer of tar paper, and then used some awesomely aged cedar shingles donated from my parents.Mostly I based my roof on this video (as well as some clarification from my Dad, the architect):
http://www.finehomebuilding.com/how-to/video/install-cedar-shingle-polycarbonate-roofing-shed.aspx


Here you can see Mike  putting the tar paper on top of the plywood


Here is a view of Mike finishing the roof. Didn't fall off once!


We also cut out the opening for the chickens to leave the coop, into the (as of yet) unbuilt chicken run. We hope they dont mind!


We also started our first coat of paint. Here is Nicky painting the body of the coop.


We still have a little bit more to do, and will post an update soon!

M & N


Tuesday, November 5, 2013

Chicken Coop construction, part 1

We have finally embarked on our long-awaited backyard chicken adventure! After many delays, we decided there's no time like the present and so spent the weekend working on the coop. Our hope - fresh eggs by Christmas, and fabulous compost in spring, and maybe even new feathered friends for Flint :)

Even though it has become incredibly easier to buy pre-fab chicken coops online, we went with the home-grown variety, with Michael designing the plans and most of the weekend spent building it ourselves from the frame up!

It began with these plans:
Plans agreed upon, we headed to Home Depot and spent a good chunk of change (thanks to Dorothy!) on lumber and building supplies.


Step 1- build the floor:


Step 2 - build the frame:
For this part, since the posts are 8 feet tall, we moved the operation to the future site of the chicken coop, in the far corner of our yard. Our neighbors are already beginning to ask questions, but we hope to win them over with offerings of fresh eggs :)


Step 3 - up go the walls!:
We finished the main structure and built the roof all in the first day, and got it into place with the help of my Aunt and cousin - thanks guys! 


Step 4 - roofing and siding:
The next day we manhandled the roof onto the coop (not an easy task), and secured it all into place. Michael is drilling the roof onto the posts, below I am busy sawing wood to complete the siding.


Step 5 - finishing touches:
Here I am designing the chicken-shaped windows to go on the side of the coop, yes, our coop will be very stylish indeed :) 


Next steps - finishing the exit hole and ramp for the chickens, decorating the coop, building the enclosed run, and finally, getting the chickens! :) See you soon!